HDRI
My first experimental image was the one above that was 1stwas processed in photmatix, HDRI than in PHOTOSHOP. The reason I choose the above is because of the glow of the sliced tomatoes, red onions and the green chillies and coriander leaves. The sliced vegetables and the bright colours give a glow to the images on the newspaper. The image was taken in a busy street that was fast takeaway food.
Did have thoughts to change the newspaper into a tray in PHOTOSHOP but, felt it would destroy the beauty of the image.
EXPERIMENTAL –DIGITAL MANIPULATION (PHOTOSHOP)
EXPERIMENTAL - HDRI
Camera used- FUJI JX 200
Settings manual
No flash
Indoor at the deli airport
This picture was taken in mind for process of its in HDRI. There were lots of details on the body of the elephants and HDRI works better on shiny and metallic objects.
Once you put your image in photomatix and after removing noise there are lots of templates you can pick and then you can further adjust the contrast, temperature etc, to get your final image that you are happy with.
Below is the image that I was happy with and the way the multiply colours fall on the body of the elephants from the ceiling and the fully lit up airport.
Lastly the image went into Photoshop and poster edge so, some details could be added.
Method used to achieve the final picture , see below
HDRI AND PHOTOSHOP
-Camera used- FUJI JX 200
-Settings manual
-No flash
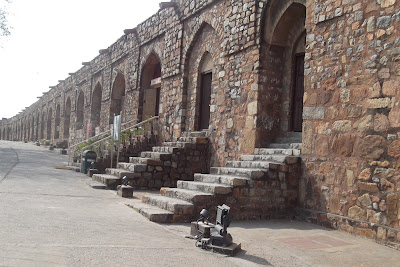
-the image was taken indoor, but the building had open gaps so natural light was coming through via the gaps
This picture was taken in mind for HDRI process because the building was matalic and marble. And HDRI works better on shiny and metallic objects. After downlodading the image it was processed in HDRI and then in photoshop until I was happy with the finished out come.
what improvements were made
proccessed in HDRI
then the yellow colour of the building arch was inproved
contrast and colour balance was also improved slightly
2 further images were copyed from the orginal were the colour of the building wea changed see below,
a b
image A,the surrounding had been changed green and the yellowish of the arch had became more yellow.
image b, the path has been changed to grey and the natural light coming through the gap has also been reduced.
my hand
The amber stone image that I used as inspiration with my hand photo is from Google and the address /ref, is below.
The amber stone was the start of my inspiration; it was my starting point where I got my inspiration from. I also did research on unique and on black and white images and came up with at Gary Schneider work on hands prints and identity. Then I came up with the idea of my hands.
Having the amber image in my mine and creating something unique, I came up with my finger prints, my hand and the colour amber. Finger prints are unique and they can’t be repeated as our hands change due to age and dryness.
Procedure
Cannon D65 camera
- I took prints
- I went into a dark room, got photograph paper and used developing solution. Then I put the developing solution on my hand and pressed it firmly on the paper and fix it.
- Then took a picture of my hand and went into PHOTOSHOP and placed the hand prints on top of the same hand.
- Processed it further in photomatix programme i.e., HDRI until I got the colour of the amber which was my finished result.
- Went back into PHOTOSHOP and removed the background and then painted the background black.
- Then I erased part of the arm so the hand would look like a wax sculpture that could be placed on the shelf.
- I thought the black background went well with the amber colour.
- Second image –the hand was flipped over in PHOTOSHOP
EXPERIMENTAL –DIGITAL MANIPULATION (PHOTOSHOP)
This above picture has gone through several stages in Photoshop to get this final piece of art work using a simple Fuji J 200 compact camera.
HOW THE IMAGE WAS
First stage
First, the pigeon feed was bought, and then a good spot was chosen where pigeons were present. I scattered the pigeon feed on the ground and then stood patiently nearby so I could see them and there would be no cars or people obstructing my view.
The camera was put in focus where I wanted my pictures taken from. So when the pigeons were flying down to the ground to feed, and flying off again i got my photos.
I needed to be fast and the camera needed to be in focus. This is very similar in taking images at a catwalk fashion shows or wedding pictures.
Once I had the images I wanted it was downloaded and processed in Photoshop, changing contrast and colour balance to improve the image until I got my final image.
Second stage
One image was chosen where the pigeon section was cut out using the eraser and the magical wand.
3rd stage
The second image I used for the background was a picture I took of a tree in a park. I used the top section of the tree and the sky where I applied several stages to it in Photoshop, changing contrast, colour balance and making the image more bluish and purplish until I got my final image that I was happy with. I used the curve, paint bush and eraser and other stages already mentioned in my first stage. Finally I saved it in jpeg to get rid of the layers and re-opened it in a new layer in Photoshop. I dragged it in that new layer re sized it and that process was repeated twice but the 2nd image was flipped over so I had a mirror image on either side. The eraser was used to remove sections on both layer that I didn't need and the pigeon was dragged into that background image and re-sized and placed where it looked realistic. Finally, using a paint brush I gave it a whitish glow of light so the pigeon would be the main focus point.
This image below was taken of a canal were the water does not move much and then it was processed in in Photoshop
inspiration came from SALVADOR DALI
Camera used D65 cannon
Settings manual
My inspiration came from looking at SALVADOR DALI work, after looking at the flat and bend clocks plus a horse bent and flat. I found his work unique and full of ideas and use of good strong colours.
New key was used in photoshop, the wrap to get the still water going down, the water fall effect.
the orginal image is of a canal were the water does not move much, were the water settles, the soil and dead debries etc.
the image is showing the dirty water of the cannal is falling into the opening like a waterfall and when it rains clean water will fall into the cannal.
BELOW, Showing hair and face expressions in halo effect
To get to the final finish image I used:
Two lights in the studio
Fan that blows cold air
Cannon D65 camera
Picture frame
Photoshop and HDRI programme
After placing the images into Photoshop
Copy section of images using the square
Go to frame picture and paste
Resize
Use tool and go around the frame were you want the image
Select and inverse
Press back space on the key board –the picture will be in the section needed only.
Select and deselect and finished now save in jpeg and layers will be lost or in Photoshop and you can make changes via layers.
This picture above is more of a typology art work due to the fact there are lots of faces that have been taken at different angles and but it is of the same person but taken at different angles via halo lighting effect.
The frames were also place on the studio floor and have been processed in Photoshop so there are more frames which were arranged in a collage way and placed at different angles.
All the images of the females face has been processed in HDRI and when finished in Photoshop I had 22 layers which was a challenge for me and have learned a great deal carrying out the digital work. However, the background was difficult to change so, I used the eraser.
All the pictures were taken in the studio using two lights and a fan. One light was placed at the back t the halo effect and one in front slightly to the side so there would be lighting on the face and the fan to the side.
After downloading the frames was processed in Photoshop and frames arranged in different angles and sizes, more like collage art.
The best halo pictures were placed into the frames and the background changed using the gradient tool and eraser of different sizes.
Advertisement
This is good if one wants to show all images on one page i.e., a good way of showing all the advertisement collection on one page.
EXPERIMENTAL -HALO EFFECT
back-lighting
to achieve the picture
I used:
· Cannon D65 camera
· Manual settings
· Photoshop programme
Two lights in the studio were used,
stronger more powerful light at the back of the subject and less powerful light on on one side of the subject's face, so i could achieve the effects i wanted.
i.e., there would be a glow of light on the face which is what i wanted to achieve.
After placing the images into Photoshop
Two lights in the studio were used,
stronger more powerful light at the back of the subject and less powerful light on on one side of the subject's face, so i could achieve the effects i wanted.
i.e., there would be a glow of light on the face which is what i wanted to achieve.
Method used to achieve the final picture
After placing the images into Photoshop
The image was improved by contrast and colour slightly
Then the image was cropped to size needed, so there was less empty space.
EXPERIMENTAL - SILHOUETTE
the three images below are an example of silhouette and were processed in PHOTOSHOP
just to improve the images slightly
To achieve the images below picture
Equipment Used
Camera used- FUJI JX 200
Settings manual
No flash
Outdoor – sun setting, cold early morning, at the railway station
Procedure
To take a silhouette image you need to focus on a bright section, pressing the focus button half way and then gently move the camera to the subject and press the entire focus button so you have taken the picture.
EXPERIMENTAL
These two above images have been digital processed in Photoshop.
The main focus point I wanted was the bee, considering the 3rd rule .
The image was first slightly improved via colour balance and contrast etc., then part of the flower was cropped so the bee was the centre piece, following the 3rd rule and finally some white light was put on the flower bulb using the white paint brush.
The 2nd image was carried out enhancing the bee further by making the whole image black and white and using the eraser tool and removing the black and white section of the bee so the colour of the bee shows from the image behind, making the the bee stand in colour, the bee which is the main focus point of the picture.
There are many images that I could have chose but this was used so I could learn the process.
EXPERIMENTAL -Self portrait
What does the umbrella symbolize about me?
Self portrait, camera setting at 10 sec
EXPERIMENTAL -Self portrait
The task was to take a self portrait and the face should be covered with something that symbolizes or represents you.
My self portrait show’s me sitting on a chair and holding the black umbrella which is covering my face and hair. The black umbrella is there for a reason, it gives a clue of who I am, an identity clue. The black umbrella represents the black cloth that I use to cover my hair with, in the presents of people. Covering my hair is part of the Sikh culture, of an Amritar Sikh.
The image has been processed in Photoshop, changing the contrast and brightness plus colour balance. The image was also cropped so there was less empty space surrounding the subject (me), once happy with results it was saved in jpeg.
I am very pleased with the finished self portrait, because the image is well in focus and the colour balance is also very good plus the outfit colour works very well with the black umbrella.
This above is my 4t h image that i have used however, all 4 images were in focus but, the black umbrella was not in the correct position, i.e., it was not covering the face fully.
WHAT WOULD I CHANGE NEXT TIME
Would change the background to black and have a bright light at the back of the subject and no other light, have a halo effect.
Tyrrell's VEG CRISPS
above is the changes and below is the original
CAMERA INFORMATION -setting
Date -13;2;2013
MANUAL = mode
NIKON D90
EXPOSURE/shutter speed -1/25 sec
focal length; 30.0mm
ISO speed;=400
FLASH ; flash did not fire
F- STOP= 5.6
resolution x300
LIGHTING = INDOOR fluorescent
why I chose this image
its a colourful image, serves it purpose. It has a lot going on, its busy and the background is black and white plus the man is also black and white but his tie is in colour. The parts that is related to the product in the bag is in colour therefore it stands out and your eyes are drawn to it.
The colour of the carrot, beetroot and parsnip images stands out well and half of the green bag plus the green laves are showing fresh vegetables are used. Under the brand name TYRRELL'S it says hand cooked and second big print is the VEG CRISP that are suitable for vegan's and vegetarian as they do not have flavouring and clearly states SEA SALT in capital letters.
HOW THE IMAGE WAS TAKEN
AFTER THE IMAGE WAS CHOSEN, THE CRISP BAG WAS PUT ON A WHITE TABLE WITH A CONTAINER UNDER THE BAG SO IT WOULD STAND UP AND THE CAMERA SETTING WAS PUT IN MANUAL AND OTHER ADJUSTMENTS WERE CARRIED OUT SO THE IMAGES WAS WELL IN FOCUS - SEE THE CAMERA SETTINGS.
ONCE DOWNLOADED THE IMAGES WAS PUT IN PHOTOSHOP AND CONTRAST AND COLOUR ADJUSTMENT WERE CARRIED OUT TO IMPROVE THE IMAGES FURTHER.
THE BACKGROUND, THE, BLACK & WHITE AREA WAS ALSO IMPROVED SO TI WAD MORE BLACK AND WHITE.
SO IN THE END THE VEGETABLES PACKAGE HAD A RICHER COLOUR AND THE BLACK & WHITE SECTION OF THE PACKAGE WAS MUCH MORE BLACK & WHITE PLUS THE BAG WAS LESS YELLOWISH.
original image
the water colour changed to more bluish
the colour of the ground has been changed to greyish

Experimental work
The images below are an example of a fish eye lens. The reason I did the images below was because i found some examples on the internet and tried to do something similar, not knowing that there was a special lens known as the fish eye lens , which I know now.
I tried to make the picture as it was taken via glasses.
this above has the natural background setting of the original image but the circle of the eyes are not as smooth as i would have wanted it.
As i new nothing about the fish eye lens- PROCESS
I put the image in Photoshop and used the FILTER and LIQUIFY, and went back to the original image and put that underlay and used the eraser brush so the picture did not look dragged.
FIRST IMAGE ON HDRI -program pro 4.2
CLEAR
EXPERIMENTAL - COMPOSITE
EXPERIMENTAL - COMPOSITE
THIS IMAGE BELOW HAS BEEN PROCESSED IN PHOTOSHOP HDRI WERE THE 3 IMAGES HAVE BEEN MERGED AS ONE. THE 3 IMAGES USED ARE BELOW.
Programme -automate, and then merged it into HDRI
YOU DO NEED A TRIPOD OR VERY STEADY HANDS and only then the images can be merge and get around 95% focus.
THIS IMAGE BELOW HAS BEN PROCESSED IN HDR WERE THE 3 IMAGES HAVE BEEN MERGED AS ONE. THE 3 IMAGES USED ARE BELOW.
THIS WAS MY FIRST ATTEMPT AND SHOES WAS MY SECOND ATTEMPT.
The above shows the 3 images merged as one in photomatix program
the cans are much colder due to the ice granular are forming around the cans
HDRI - MY WORK AND EXAMPLES FROM GOOGLE
IT LOOKS AS IF ITS TAKEN USING GLASSES AT WAY THE TRAIN IS MOVING INTO A CURVED DISTANCE AND THE DETAIL OF THE GRAVEL
THE DETAIL OF THE SKY, THE FAST MOVEMENTS OF THE CLOUDS, THE WAY ITS MOVING AND THE THE CLOUDS ARE CLEARLY SEEN.


No comments:
Post a Comment